Do not limit the possibilities of this simple product to just the hard rectangular paraffin wax. Paste wax in the workshop can help prevent rust, smooth surfaces, prevent glue from adhering where you do not want it, and assist with fitting drawers and lids.
Paste wax comes in many different brands and mixtures, but I have found that Trewax and Johnson brand paste wax work the best. All waxes are originally solid in form. They are then dissolved in a solvent, usually a petroleum distillate like mineral spirits. Once the solvent evaporates it will leave a thin film of wax on the surface.
I use paste wax to prevent rust on my hand tools when I am storing them for long periods of time. For day to day use I will apply a thin coat of camellia oil to each tool at the end of the day. Paste wax is great for preventing rust on all power tool machine tables like the table saw, band saw, planner, jointer, router tables and even use some on the fences as well.
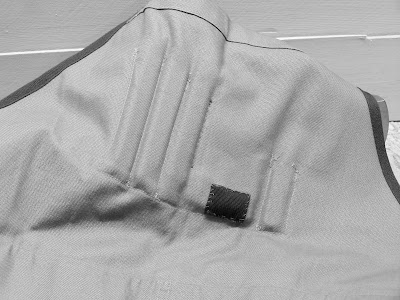
Waxing the bed of a shooting board allows the craftsman to shoot all day long without it becoming arduous.

Paste wax can help make your next projects parts fit perfectly. When fitting the lid on the Herwiggy humidor I used a thin coat of paste wax on the lid. When the lid was closed, tight areas would show up on the lid slip. I would locate these areas and take gossamer shavings to remove the material for a perfect fit. The same rules apply when fitting drawers in the traditional manner used by Alan Peters. Once the drawer is build, but before the bottom is slide in wax the drawer opening in the carcass. The wax on the inner surfaces of the carcass opening will burnish the high spots and allow the craftsman to achieve a perfect fit.
 There are few things that I would rather be doing than working in the shop. The winter always brings a conflict of interests to the world of COR woodworks and carving the Herwiggys. My weekends thus far have succumbed to skiing and woodworking has filled the evenings a couple nights a week. I might just have to quit my day job to give myself enough time to squeeze all this in. But there is always a fine line on how to split your free time. Blending the two hobbies I love to do, I just finished a Ski rack for some friends in the Tetons. The background mountain range is a silhouette of the Teton Range with space to hang up to 6 pair of skis. This project was inspired by a smaller version I have made as a key rack. I am sure the Ski Rack will be put to good use. Maybe soon to store some Herwiggys!
 For years now I have been religiously submitting some of my ideas to Fine Woodworking and Woodworking Magazines to have them posted in the Methods of Work or Shortcut sections. This past summer I submitted a Shortcut to Woodworking Magazine. The shortcut was a upgrade to the David Charlesworth Ruler Trick. The shortcut was published in the winter 2009 Woodworking Magazine. The Text read as follows.

 Sharp Tools are a must when working with hand tools. The more I woodwork the more particular I become when it comes to sharpness. What I use to think was sharp 2 years ago I would consider too dull to work with today. To keep my tools sharp I use a series of Norton waterstones. I own a 200, 1000, 1000/4000 combo and an 8000 stone. I have found that I do not use the 220 on tools but really just use it to flatten other stones. I will also flatten stones on 120-grit drywall sanding screen on a granite surface plate to ensure they are as flat as possible. One of the first stones I purchased was the 100/4000 combo stone and it has seen heaps of use to the point it was becoming very thin. I was afraid that under the weight of the sharpening process that the stone might be flexing. To prevent this I Gorilla glued two stones together to make a thicker single stone. I glued a solid 1000 to the 1000 side of the combo stone. The trick works like a charm and it extends the life of both stones significantly.